During the past year we embarked on an
inspiring journey of resilience and determination as we have undertaken a
comprehensive refit. Hindered by the pandemic, we faced the daunting task of
renewing the neglected underwater ship. From repairing broken components like
the sail drive sealing and transitioning to lithium batteries, our agenda was
ambitious. In this article we describe the tasked we have done on the
underwater ship like stripping off old antifouling and tackling the unexpected
challenge of a cracked rudder blade. We made a game-changing decision to use Coppercoat for long-lasting protection while learning to deal with the
complexities of its application. With surface preparation and valuable insights
gained along the way, our efforts resulted in a satisfactory outcome. In the
final assessment, we provide a comprehensive review of our accomplishments,
highlighting the aspects we believe were executed successfully, as well as
areas where we would approach differently. Our intention is to share these
insights so that others can learn from our experiences when undertaking their
own Coppercoat application.
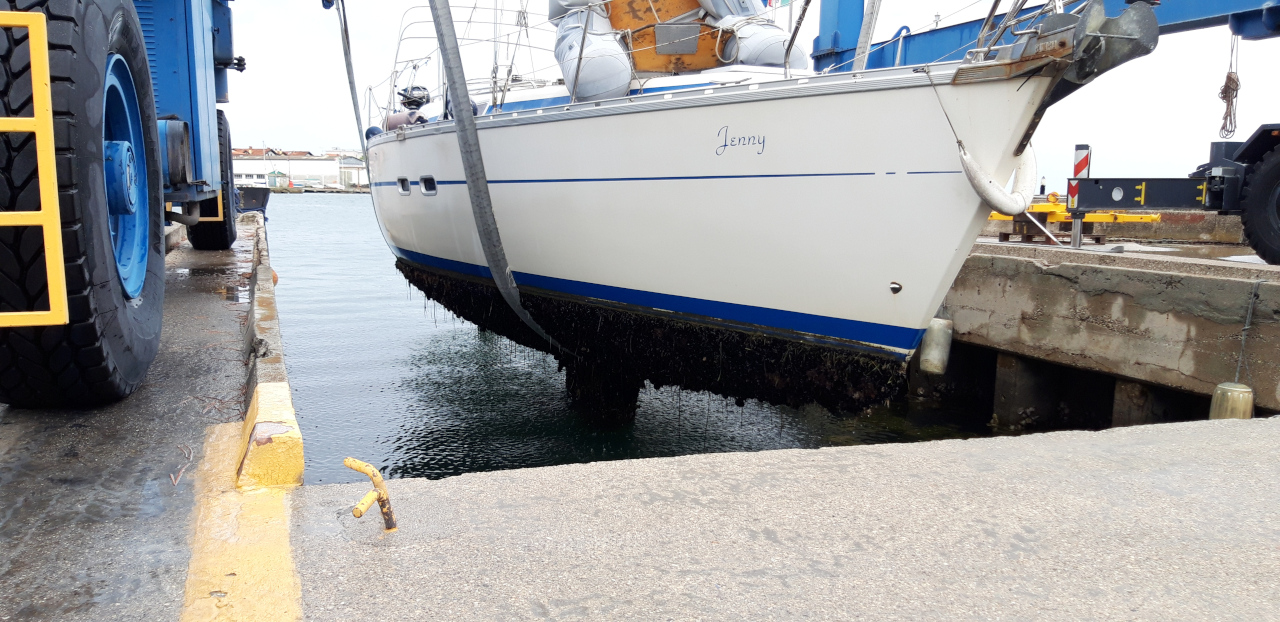
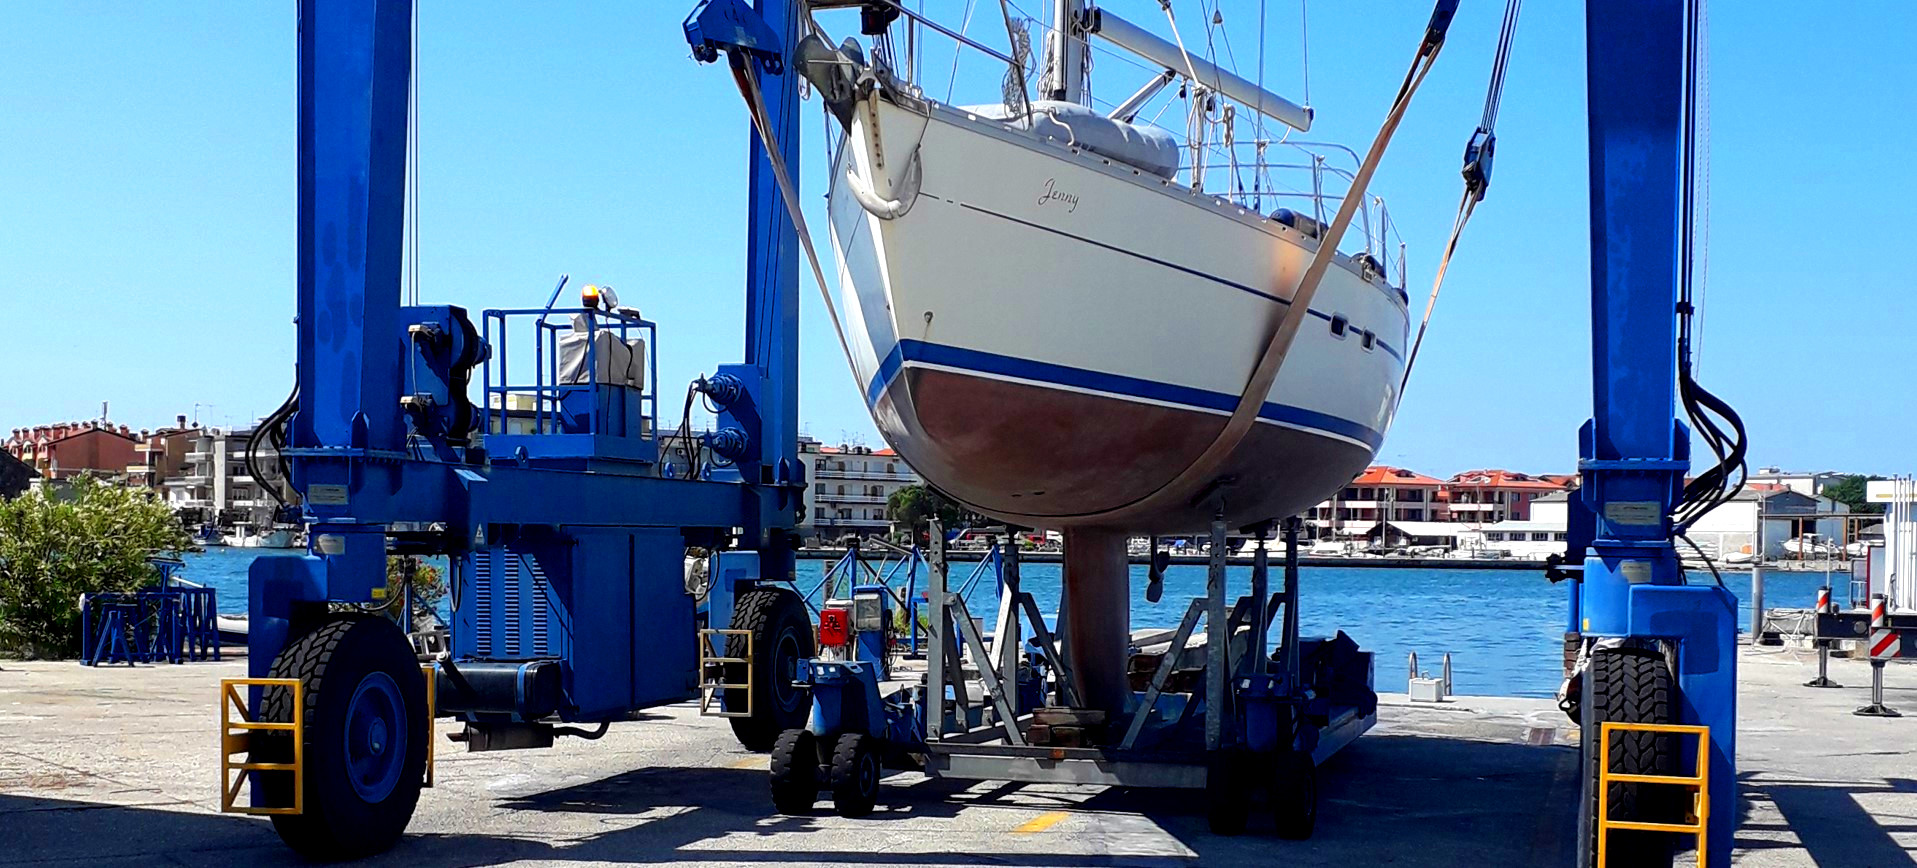
Last year, we finally had the opportunity to haul our sailboat Jenny out of the water. Due to the pandemic, the underwater ship hadn't been renewed in three years, resulting in significant fouling buildup on the hull. Unfortunately, the crane belt was not properly positioned, causing our sail drive sealing to burst under the weight of the boat. It was definitely disheartening to see this happen to our beloved sailboat, but we turned it into an opportunity and embarked on a much-needed refit.
The following tasks were on our agenda:
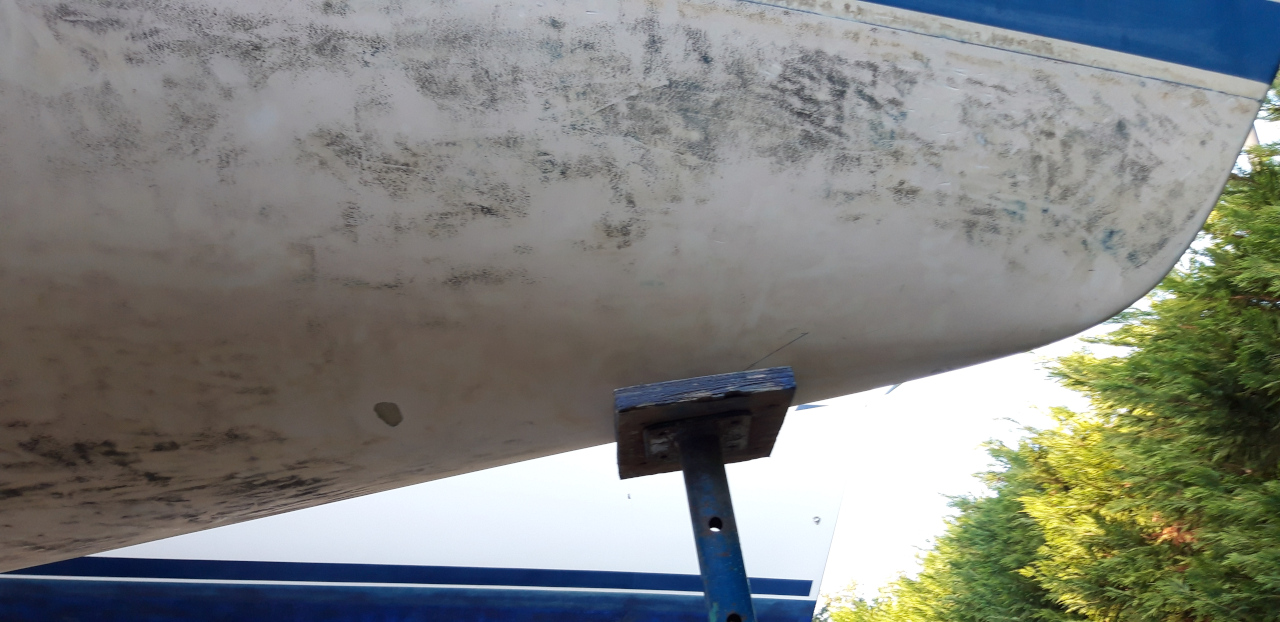
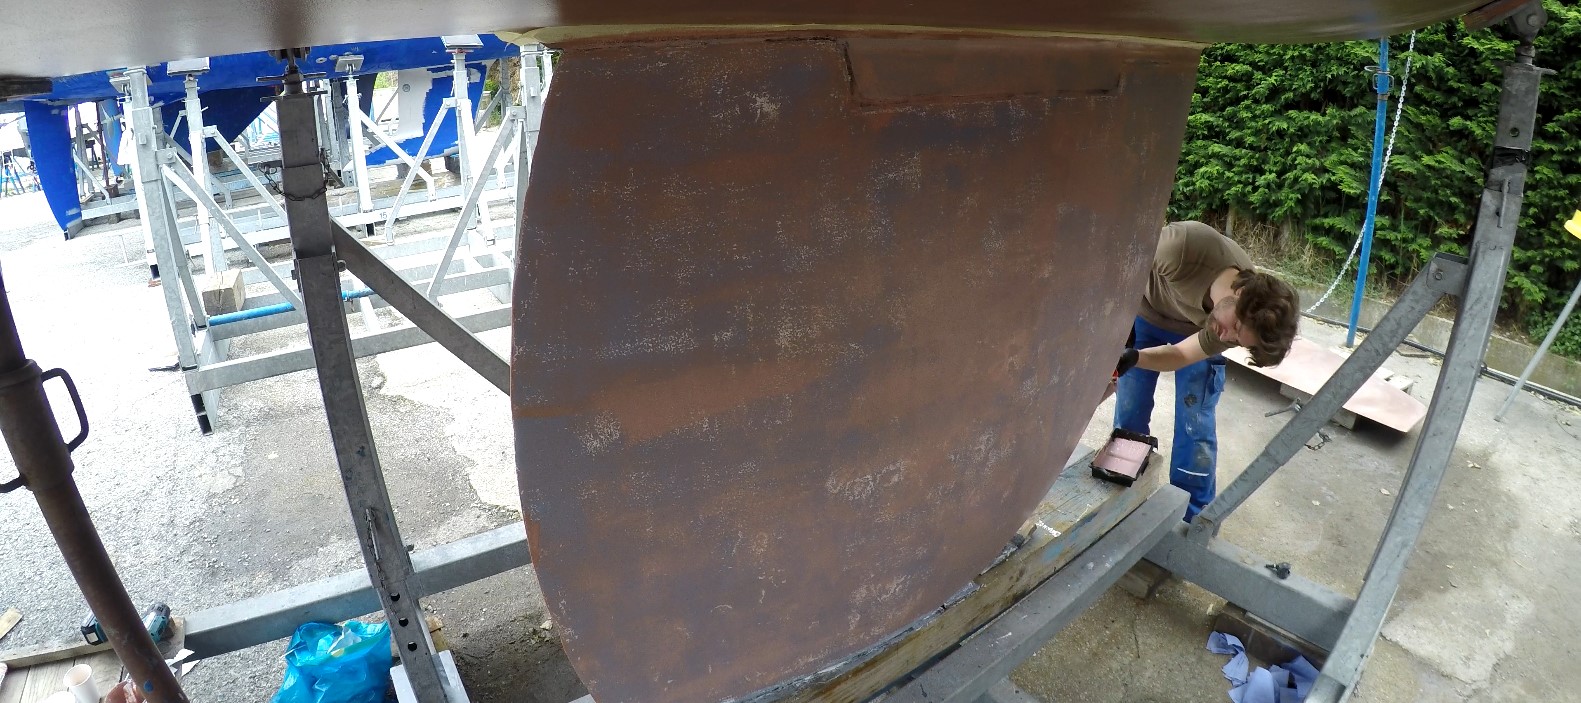
Considering the poor condition of the old antifouling, we decided to remove it completely, especially since the boat was going to stay on dry land for an extended period. Stripping off the old antifouling was not a task I would like to repeat. We used hand scrapers, which I highly recommend. However, the ones that can be connected to a vacuum would be even better, as this work generates a lot of dust. It's important to note that the dust gets everywhere, so wearing a full-face respirator and eye protection is a must. We only used a regular respirator and safety goggles, but a full-face respirator is highly recommended. During the removal process, we discovered that the rudder blade had some cracks, and there was a possibility that water had seeped into it. As the year was coming to an end, we decided to remove the blade and take it back home for repairs.
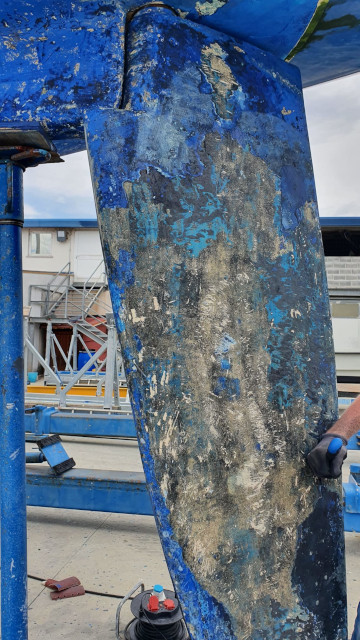
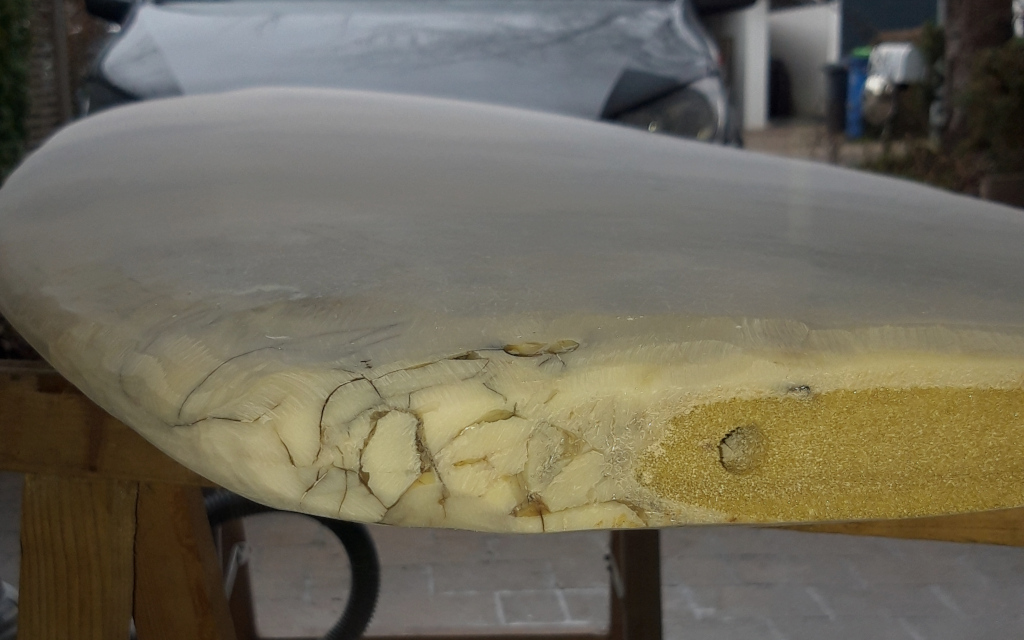
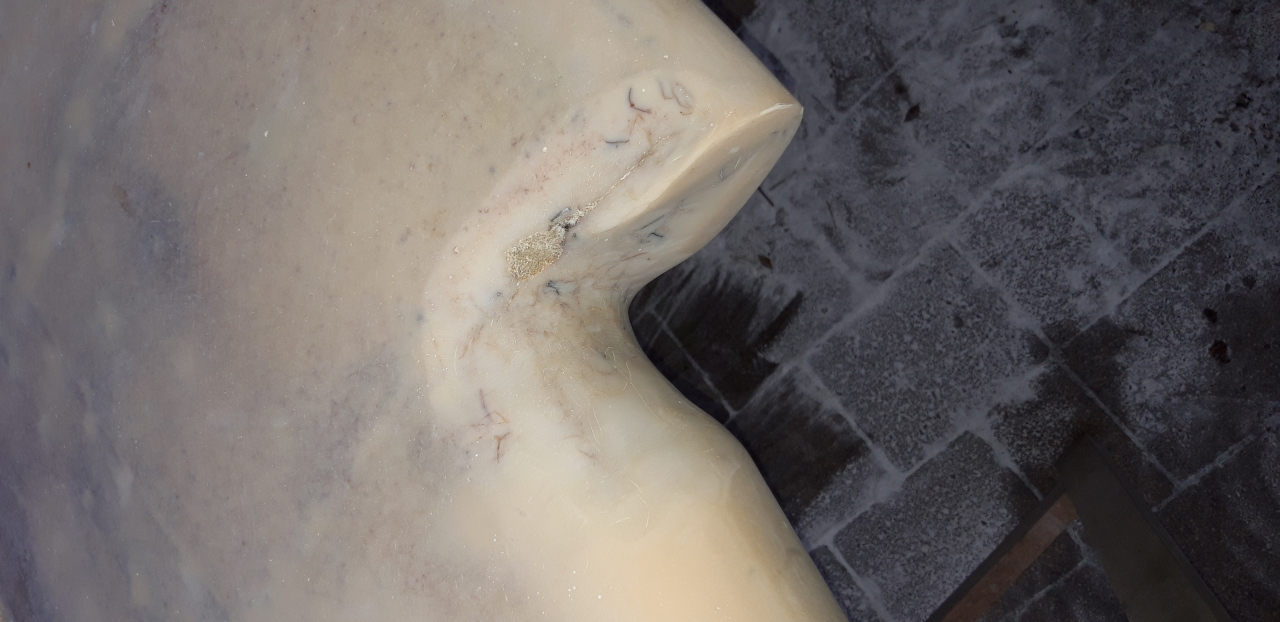
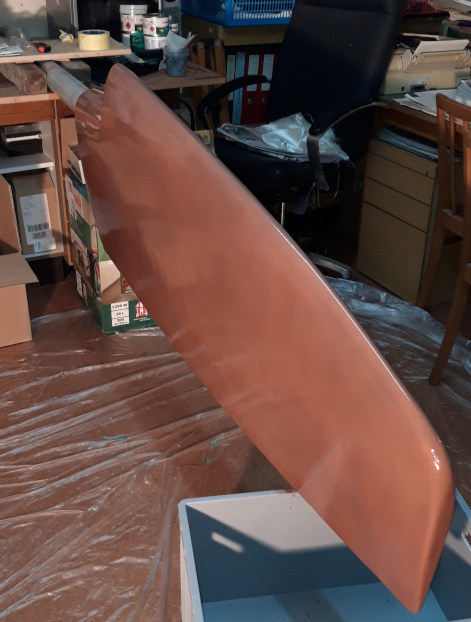
At home, my father took on the task of sanding off all the gelcoat from the rudder blade to allow it to dry out more effectively. As you can see, the blade had significant cracks, most likely due to grounding at some point. Fortunately, the foam inside remained intact. After giving the blade sufficient time to dry completely, I removed loose and cracked parts. Any dents or holes created in the process were filled with thickened epoxy. Once the epoxy had successfully hardened, I used an angle grinder to reshape everything, which turned out to be quite successful.
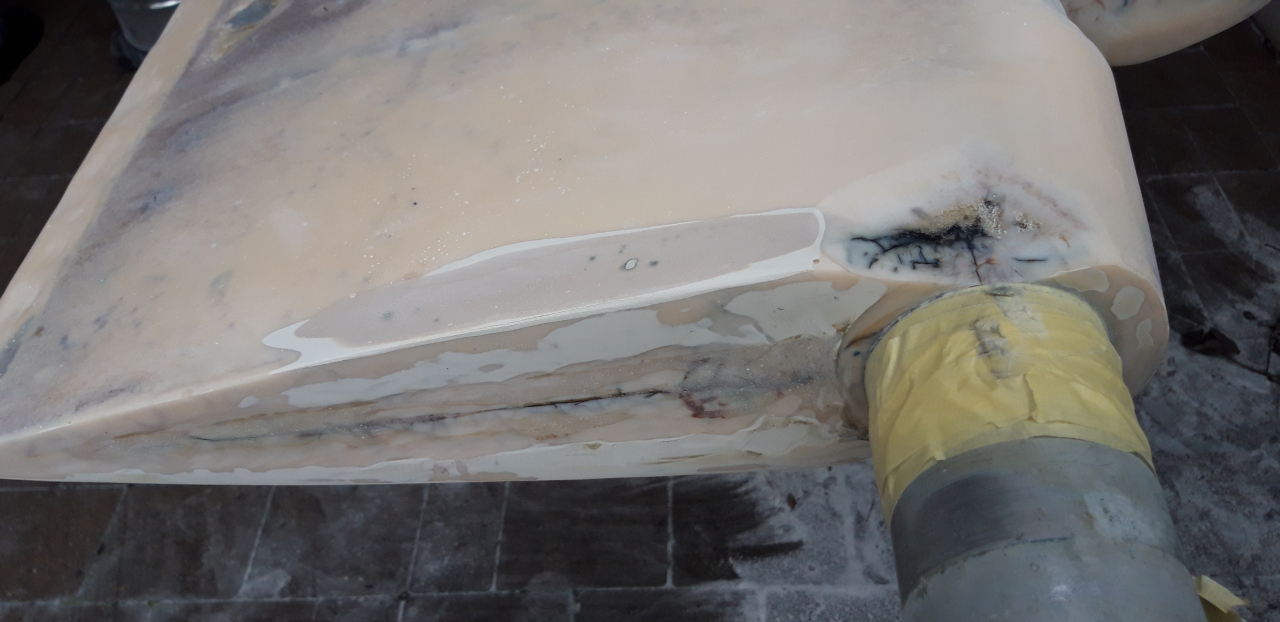
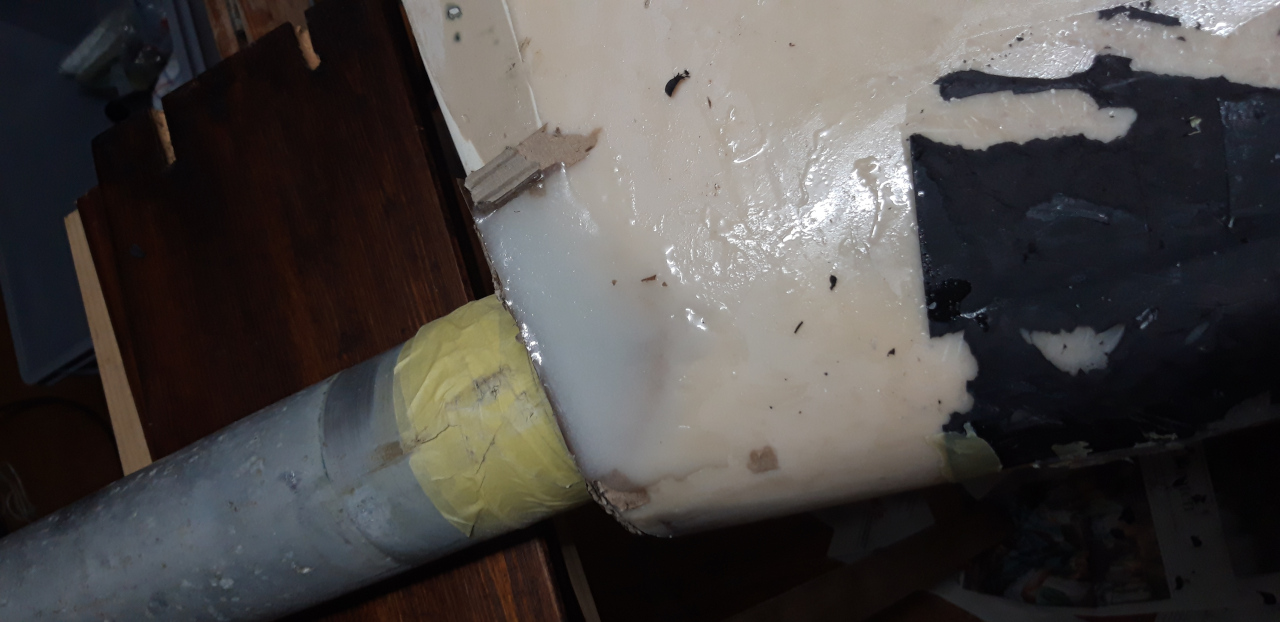
To ensure the rudder would regain its strength to withstand the forces of the water and provide an effective barrier against osmosis, I decided to cover the entire blade with a layer of fiberglass. This was followed by multiple layers of epoxy for added protection. The surface was then sanded smooth, and five coats of International Gel Shield were applied as an additional water barrier.
During the winter, I made the decision to use Coppercoat instead of regular antifouling. The rationale behind this choice was that we had already removed all the old antifouling, and an epoxy primer needed to be applied anyway and the cost for a few layers of epoxy primer and three layers of antifouling wouldn’t been much less. There was an additional effort required for activating the Coppercoat. But the prospect of not having to reapply antifouling each year and avoiding the need to lift the boat out of the water in the future were significant cost-saving factors.
The only challenging aspect was the application process itself, which gave us some headaches. None of us had prior experience with such a task, and specific weather conditions and temperatures were necessary for optimal application. To make matters worse, we only had a two-week window to complete both the final preparation, including sanding off the remnants of the old antifouling, and the application itself. However, the potential benefits made it worthwhile to give it a try when everything aligned perfectly.
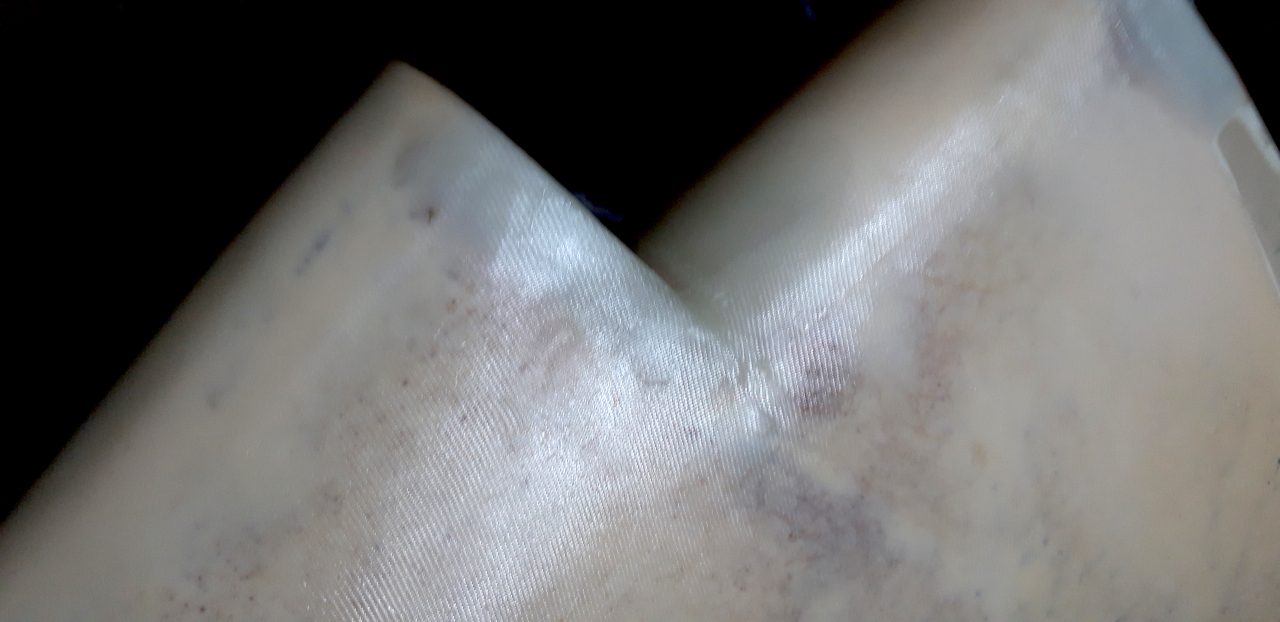
Since we already had the rudder blade at home, we conducted a test application on it, which turned out to be quite successful. This reassured us in our decision to proceed with the Coppercoat application.
After all the preparation, our winter break felt short, and in April, we began working on the boat. As mentioned earlier, our first task was to sand off the remaining antifouling, but we also had to focus on the keel.
During the initial three days, I utilized an angle grinder equipped with grinding wheels and wired brushes to work on the keel. My objective was to remove everything until only the bare metal remained. Unfortunately, due to numerous holes, achieving a perfectly clean surface proved challenging. Nonetheless, I did my best given the time constraints. Later on, I discovered that there are even coarser grinding wheels available that I couldn't find at the local hardware store. Following the grinding, I cleaned the keel with acetone and applied a layer of International Interproject as a primer, all in a single day.
Meanwhile, my father and brother began cleaning the hull. It took us three days to fully sand off all the paint, and by the end of the day, we washed the hull with water and a small amount of dishwashing detergent.
On the fourth day, the process was relatively easier. We simply wiped off any remaining dust or grease with isopropanol and applied a layer of Hampel's High-Protect II, a thick layer and solvent-free primer. This was crucial because it allowed us to proceed with the copper coat the following day.
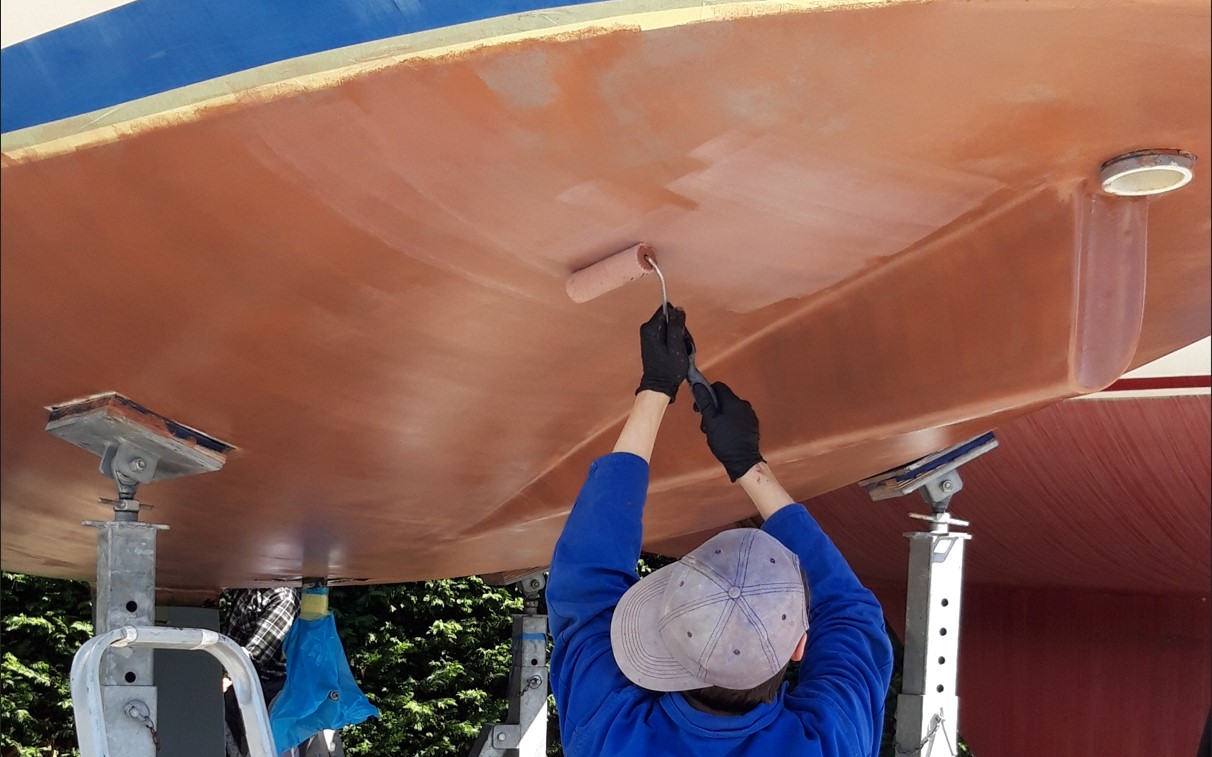
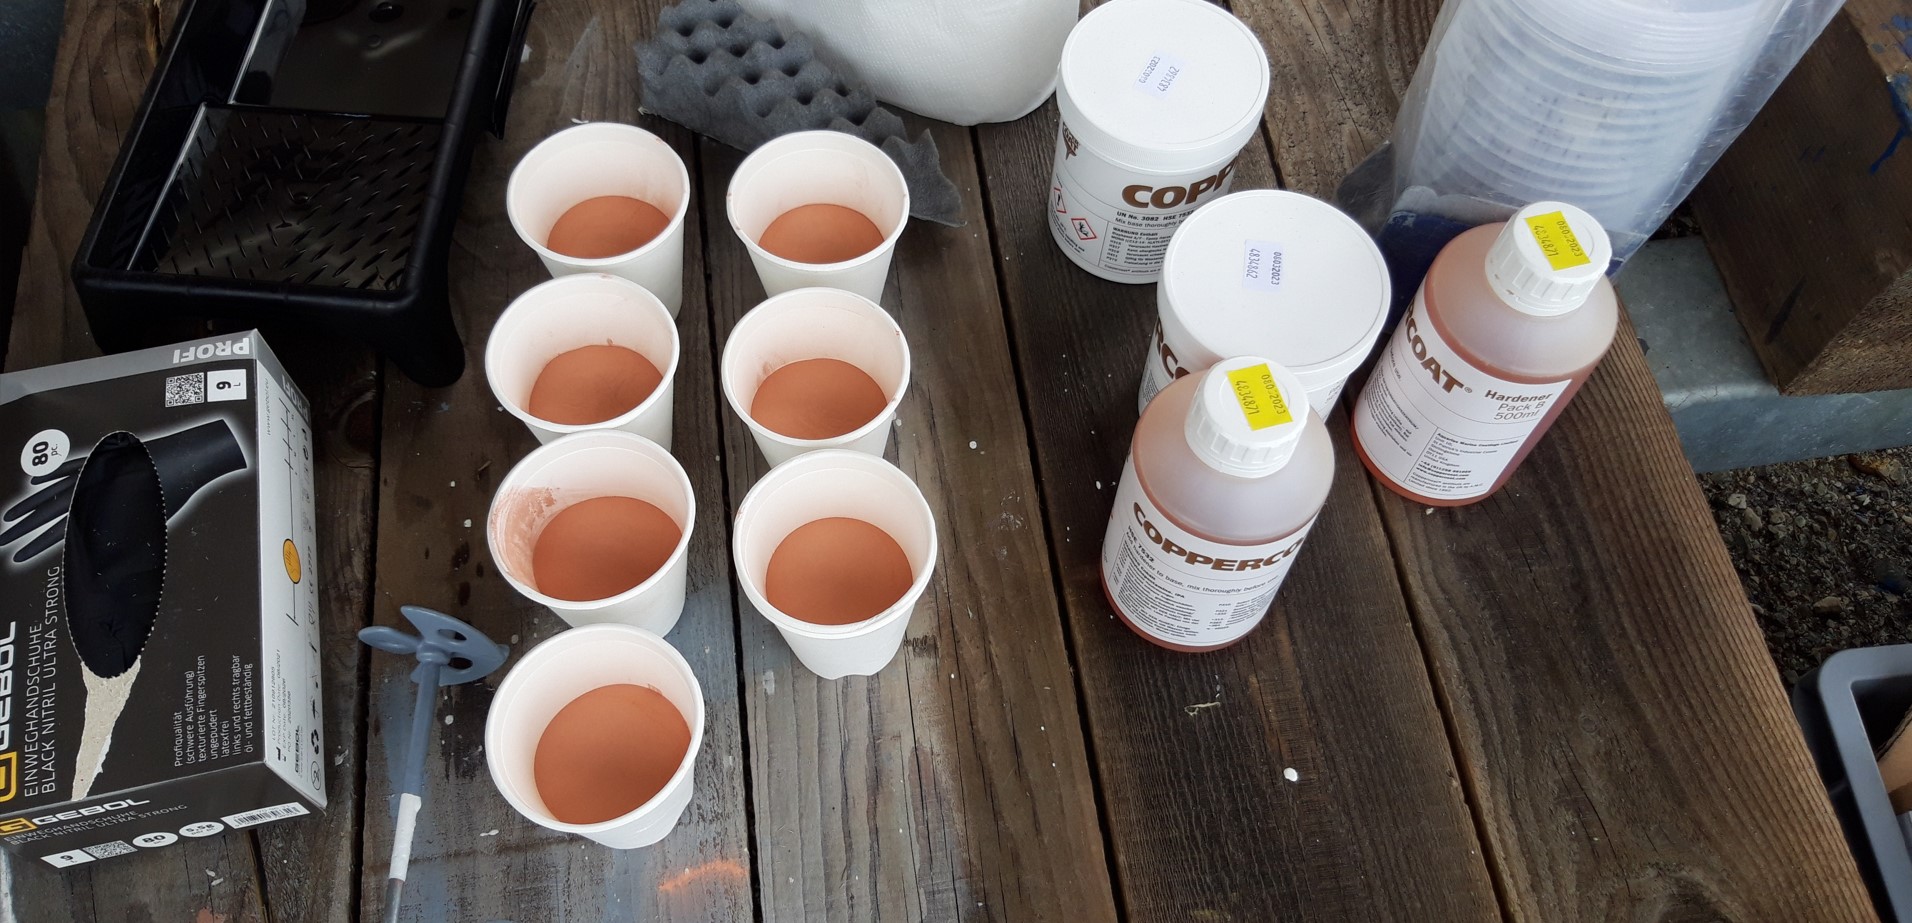
When it came to applying the Coppercoat, it didn't feel like a daunting task. Since the keel wasn't ready yet and the rudder-blade was already finished, we only had around 28m² of area to paint. We had 8 liters of Coppercoat, which we applied in seven coats, mixed in half-liter portions. This involved combining 500ml of epoxy with 500ml of hardener and 2kg of powdered copper. We also added isopropanol as a thinner. It was important to thoroughly mix the epoxy with the hardener and thinner before gradually adding the copper powder.
While applying the Coppercoat to the hull, the first layer of primer on the keel had ample time to harden. Typically, we would have prioritized priming the keel, but due to an unfavorable weather forecast, I decided to seal the gap between the keel and the hull first. We used Sikaflex 501i as the sealant, which was applied to the primer from both the hull and the keel. Since Sikaflex requires humidity for activation, the impending rain didn't pose a significant issue.
The subsequent steps involved sanding the primer on the keel and filling all the holes with epoxy filler. We used 120-grit sandpaper to sand the primer, and for reaching into the holes, an abrasive fleece proved highly effective.
After the application it is crucial to protect the Coppercoat from rain for at least three days at a temperature of 20°C. Unfortunately, we only had two dry days with slightly lower temperatures. On the third day, it rained heavily, but fortunately, the coat had hardened sufficiently to prevent runoff. However, where the water ran over the hull, the copper coat softened temporarily. Thankfully, it appeared to harden again after drying. I did my best to minimize water runoff over the hull and hoped for the best. Once the rain subsided, traces of where the water had flowed were still visible, but the coat had completely hardened once more.
After the rain had ceased, the filler and sealant on the keel had fully cured, and it was time to sand them flat using 80 to 120-grit sandpaper. With the surface adequately prepared, we were ready to apply the second, third, fourth, and fifth layers of primer. Each layer alternated between gray and white and was applied approximately half a day apart. Due to the solvents present in Interproject, we had to wait for at least seven days before applying the copper coat to the keel.
Two weeks later I once again sanded the Keel using 80 to 120 grit paper, ensuring a smooth surface. On the first day, I diligently cleaned the Keel with water to remove any residual debris. The following day, I thoroughly wiped off any remaining dust and grease using isopropanol.
For the application of the copper coat on the Keel, I used 2 liters. Typically, 1 liter covers the necessary 4 layers and an area of 4m², which conveniently matches the size of the Keel. Due to the unavoidable wastage, some more had to be used. And for us those 2 liters lasted for an impressive 7 coats.
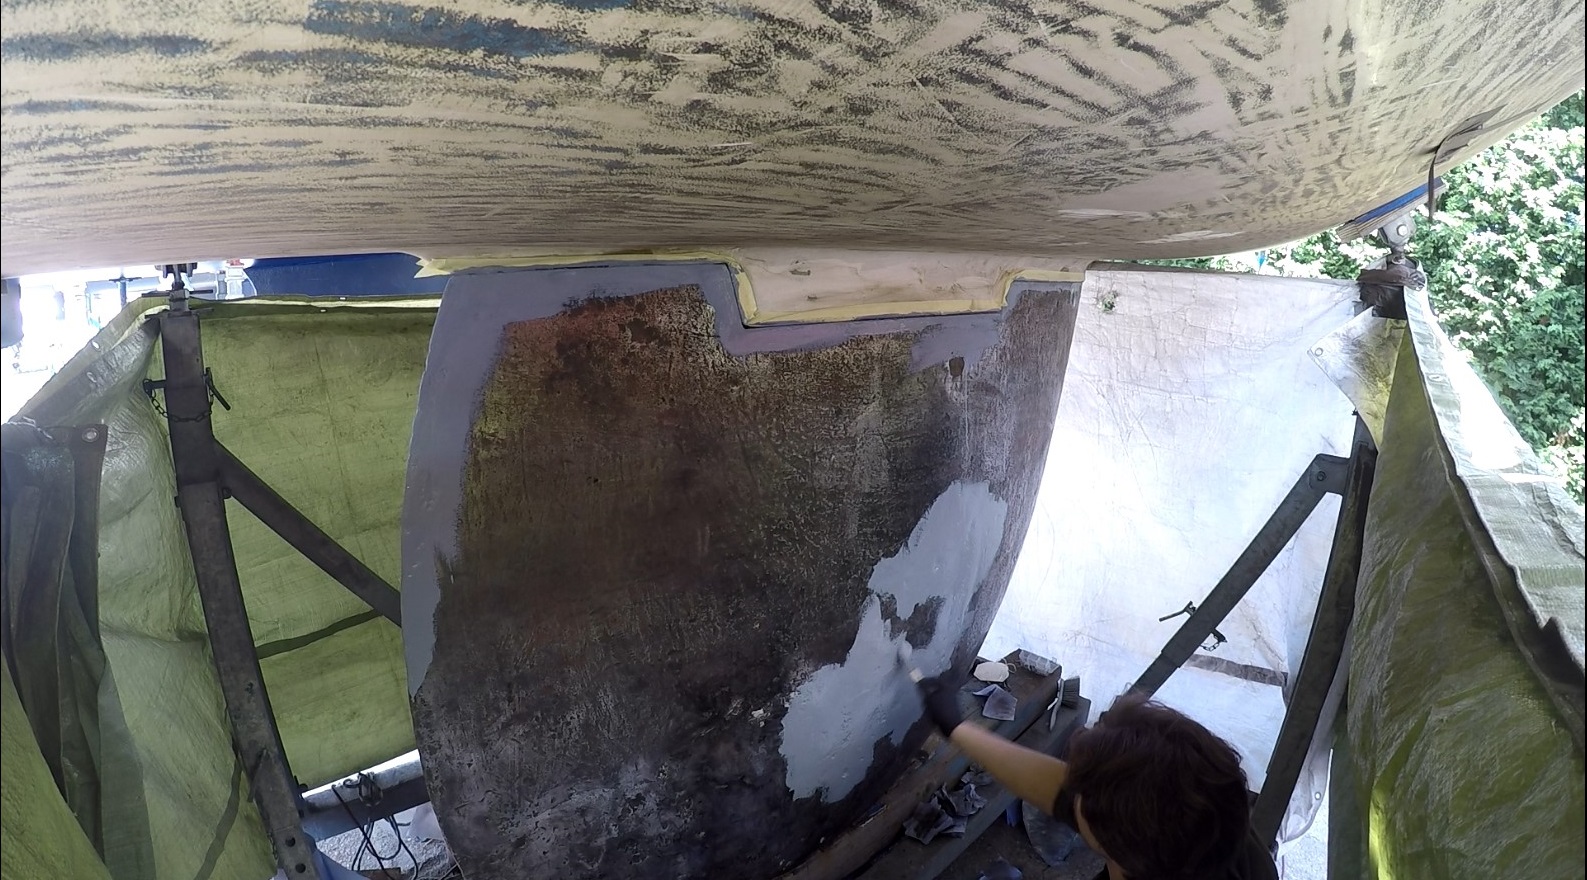
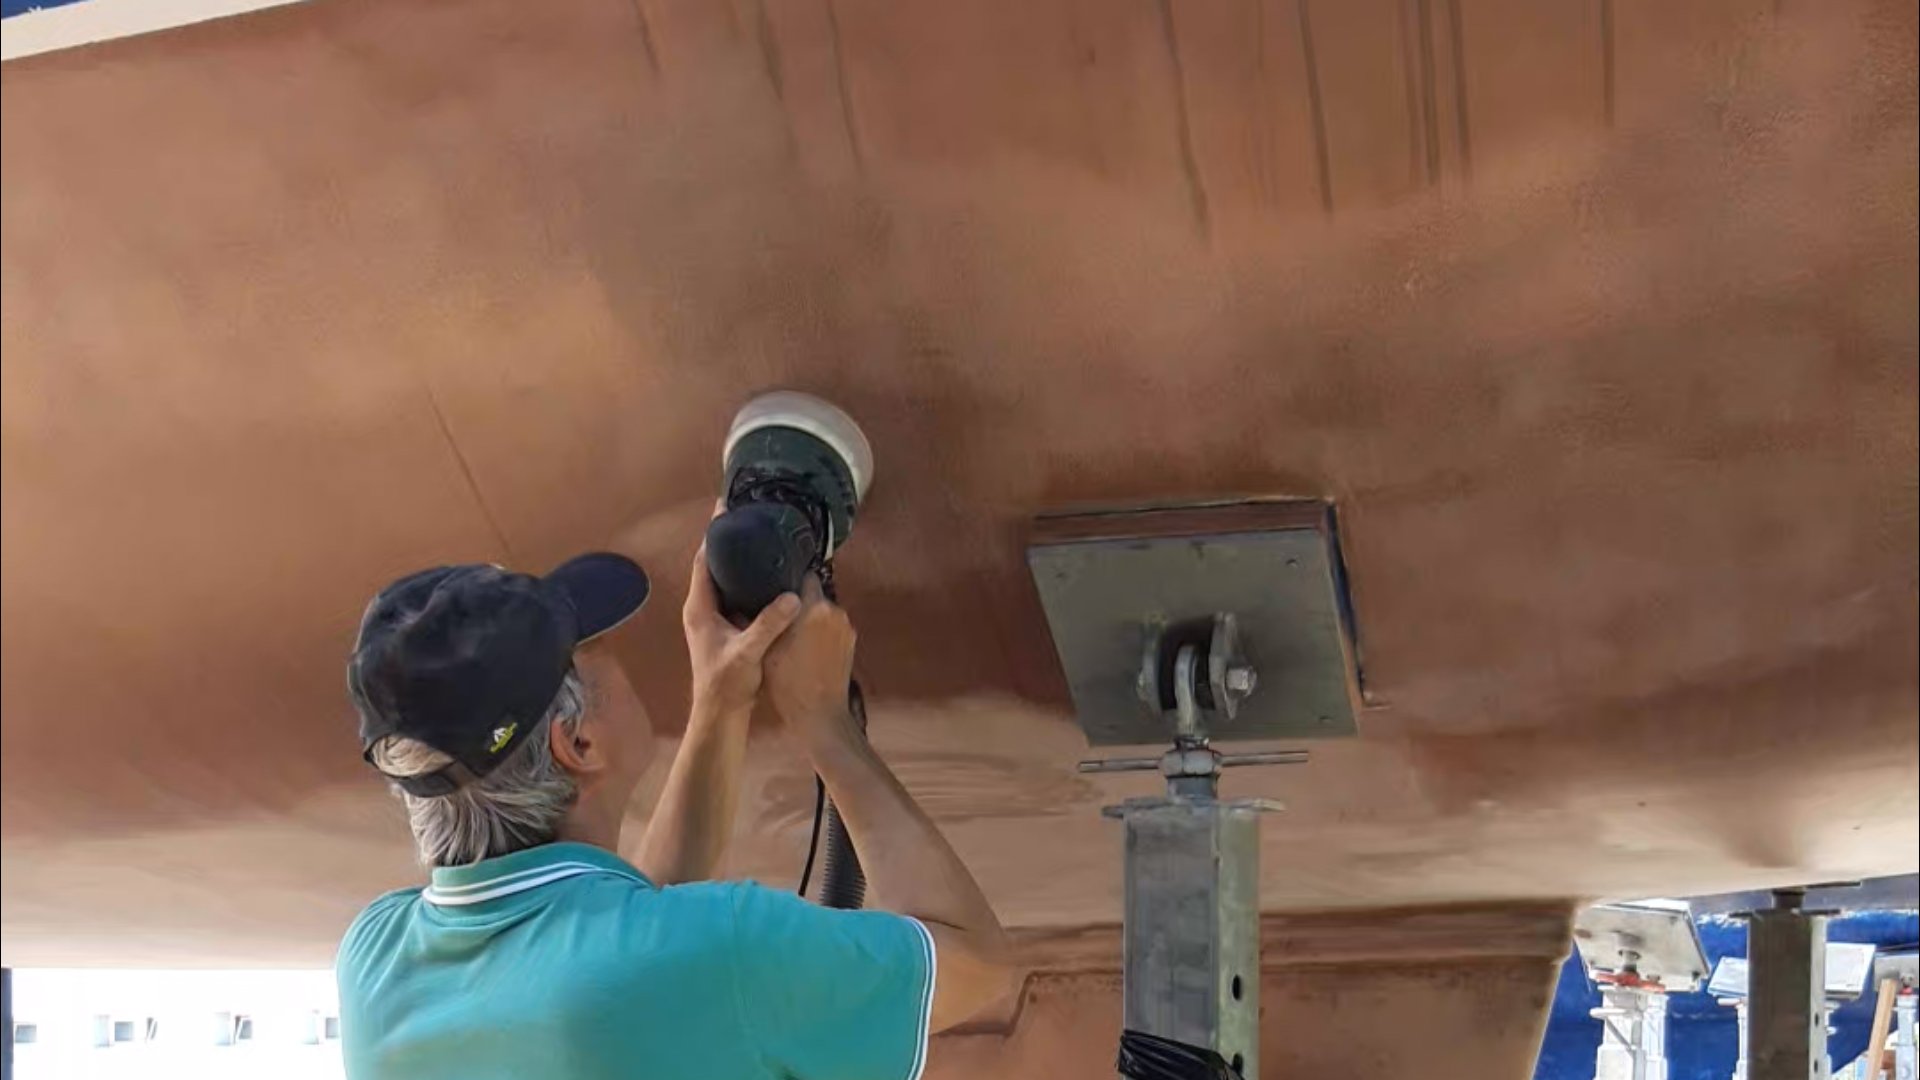
In June, my father and I embarked on another trip to Italy to complete the necessary activation process of the Coppercoat on our boat. Following the manual's instructions, we were advised to use 400 grit paper for the activation. However, due to the uneven surface of the Coppercoat on the hull, we didn’t get very far with that. Ultimately, we found that a combination of 180 grit paper and a soft adapter plate for the sander yielded the best results for us. Thankfully, the keel was much easier to sand as its surface was smoother.
One challenge we encountered on the hull was finding the right balance between insufficient sanding, leaving some parts unactivated, and excessive sanding, which would expose the primer. To address the dents and hard-to-reach areas, we made use of sanding fleeces, which proved to be highly effective in activating. As a result, we now have sections that are perfectly activated, as well as some areas that may have been underactivated or overactivated. But we did that intentionally for the purpose of assessing their performance. And of course, I will share the outcomes of our later investigation with you.
After conducting three applications of Coppercoat on our boat, I gained some insights into what worked better or worse. One important discovery was that the consistency of the coating improves when using less thinner. Unintentionally, during the application on the keel, I forgot the thinner in the first layer, and to my delight, the result turned out to be excellent. Consequently, I decided to use less thinner in the following coats as well. Additionally, I made sure to stir the paint tray intermittently to prevent the copper from settling at the bottom. This method proved to be highly effective, resulting in the application on the keel being the best out of all three attempts. I would also recommend mixing smaller quantities instead of using the 1-liter packages provided by the distributor. Half-liter portions worked quite well, and they are also easy to measure accurately.
Another crucial aspect that should not be underestimated is the preparation of the surface. The flatter and smoother the surface, the easier the activation process becomes, and the better the final result will be. Unfortunately, our biggest failure was not to sand the bumpy painted primer to achieve a truly flat finish. However, considering the constraints of time and weather working against us, I believe the result is still satisfactory.
I hope you find this article interesting, and if you are planning your own Coppercoat application, these hints will help you achieving the best possible outcome.